Course-Complex Documentation
- created: 09/24/2020
- latest update: 10/08/2020
- by: Digital-Tricksters
- digital-tricksters.com/
- email: info@digital-tricksters.com/
This documentation was made only with the Documenter
General Introduction

Course-Complex plugin is the only plugin to create a Course Marketplace for Moodle that provides all the features and user experience that you or your customer look for, in any standard marketplace.
About this Documentation
This documentation should help you get started. It covers everything you need to know to get the plugin up and running. Please read this documentation thoroughly, if you still experience any difficulties please get in touch with us.
So, let’s get Course-Complex installed on your Moodle site!
Installing the Plugin
Installer files:
- coursecomplex zip
- linktocoursecomplex.zip
Installation sequesnce:
At first, you will need to install
- coursecomplex zip
Then you will need to install
2. linktocoursecomplex.zip
The second one is a local block plugin for the users to access the Course-Complex pages easily anywhere from your Moodle site. It is a dependant block plugin on Course-Complex main plugin.
Upload and install via ZIP file
- Login to your Moodle site as an admin.
- Go to Administration > Site administration > Plugins > Install plugins.
- In your downloaded package , open the folder Plugin.
- You will see two Zip files there.
- Please Choose the coursecomplex zip
- Check that you obtain a 'Validation passed!' message, then click the button 'Install plugin'.

During the next steps the Moodle database will be upgraded. Though you can already set up the theme options at this stage, it is recommended to leave the theme options at the default settings at first and just klick Save Changes to continue.
Installing manually at the server
Please follow the exact same process for the installation of linktocoursecomplex.zip after you have successfully installed the coursecomplex.zip
See Also:
Plugin Set Up
Plugin set up: Course-Complex
After installation, please click Site Administration:

You will see Course-Complex settings there:

Click on any of the 4 settings options of Course-Complex to edit it’s settings:
Products Settings

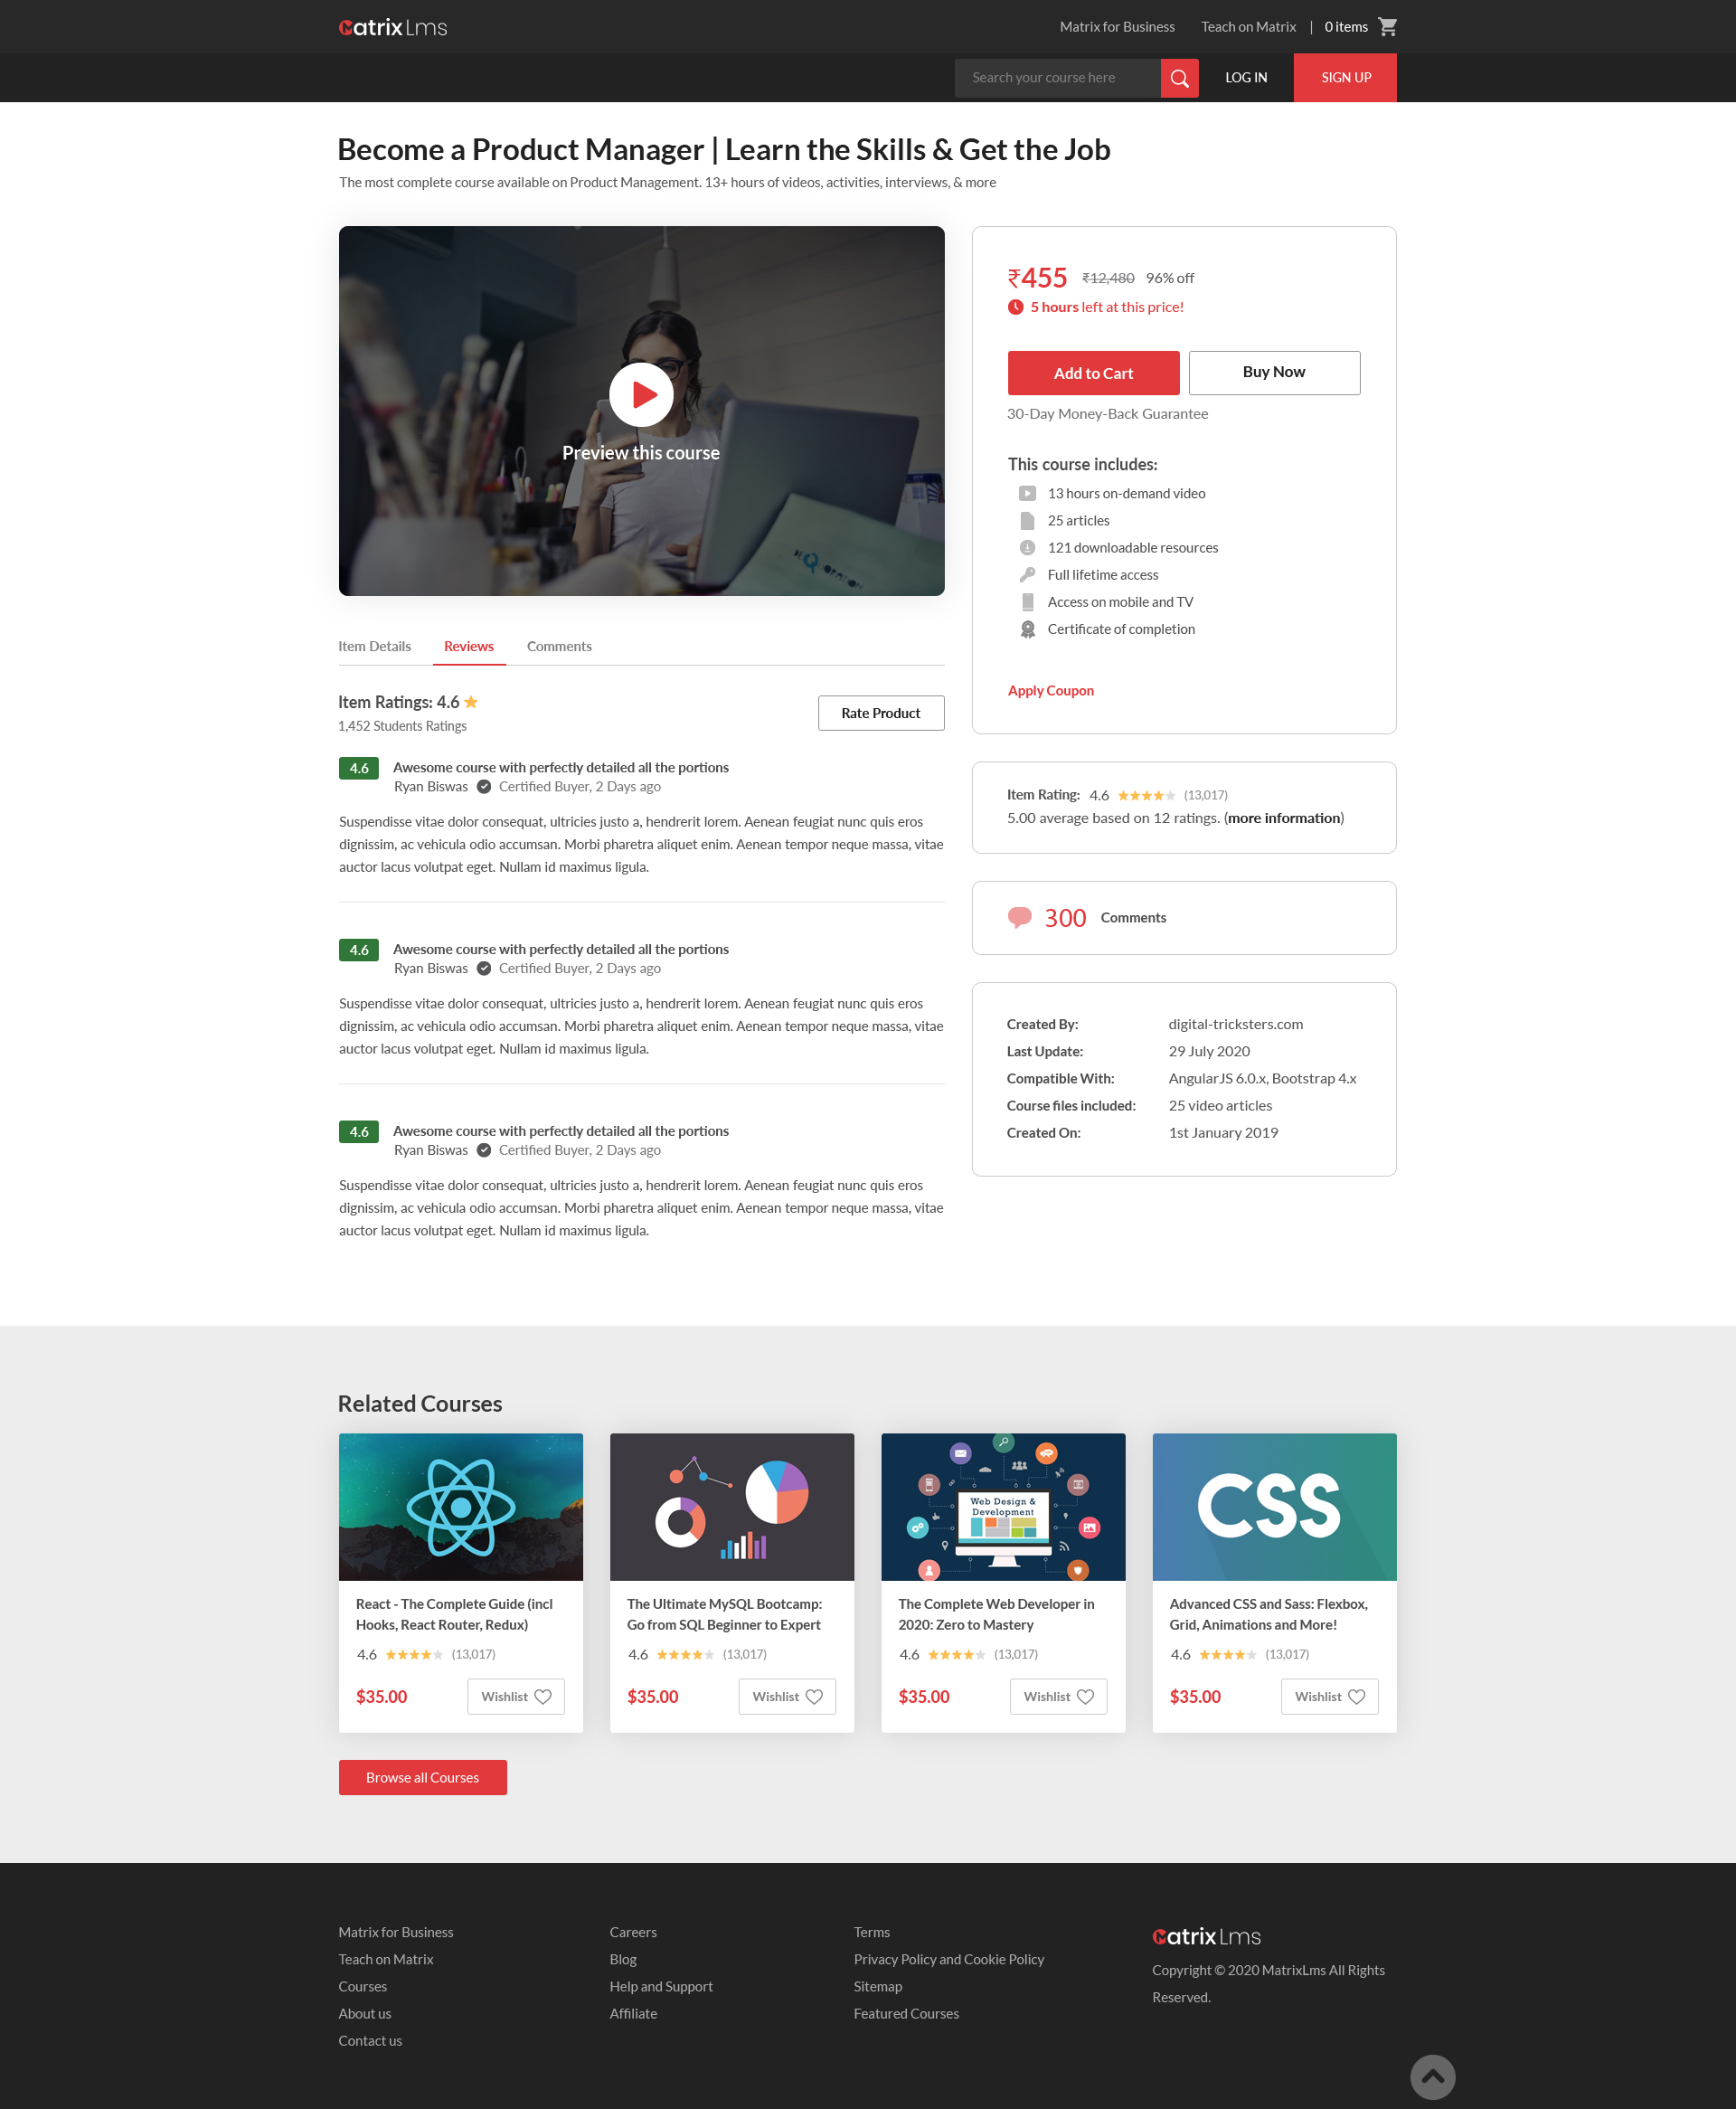
Now, it also has a dedicated single product page to boost your sales. When you click on any course on shop page, it takes you there.
Lets check how it looks like:

Most of the content is fetched automatically, but you will need to put some details manually too.

Lets check the settings one by one:
Product visibility:
- Private: If you select this the course won’t appear in the shop page.
- Public: If you select this the course will appear in the shop page.
Product Name: Type your product name or course name when you want a different product name.
Video Embeded Url: You can upload your video description here by pasting a video embedded link.
It is for this section on the Single product page:
If you do not enter any link there, it will display the course image.
Product Details: Type in the details that you want to display here as the item details.

Product Type: Choose whether it is a free or a paid product.
Related Products: Choose which products should appear as the recommended suggestion.

It will then appear as this:
Product Tags: Product Tags is that helps to find similar products on selling purpose
Note: Syntex to write product tags is enter 'product-tag-text' than give a ',' (comma) than enter another 'product-tag-text'
Ex: physics,science,quantum
Enrolment Duration: type the number of days for the enrolment period.
If the enrolment period is over, the student is automatically unenrolled from the course.

Payments Settings
Payments Settings
-
You can use Stripe, PayPal and Authorize.Net as the payment gateway.
-
You can use either of them or all three at a time.
In the general settings, you can put your currency, coupons and coupon percentage to be used by the users in the cart page. -

-
PayPal settings
- Creating a PayPal account:
-
1. Create a PayPal account at https://www.paypal.com
o Although not required, it may be wise to upgrade your account to "Premier" status and get "Verified".
2. Set the encoding to UTF-8.
o Go to Profile > Profile and settings > My selling tools > More selling tools > PayPal button language encoding
o Make sure you have your website's language set to Western European Languages
o Click the "More Options" button
o Set encoding to "UTF-8" and let the same encoding be used for IPN, too.
3. Enable instant payment notifications (IPN)
o Go to Profile > Profile and settings > My selling tools > Getting paid and managing my risk > Instant payment notifications > Update
Turn IPN on
Then, lets check the settings that we need to put in our plugin's settings:

If you want to use PayPal,
please select Allow PayPal payment to "yes"
In test mode enable the sandbox. In live mode, dibable it.
PayPal business email: Put the email address of your business PayPal account.
The rest of the settings are well described with images on the settings page.
Authorize.net

Authorize.net login ID = Copy API Login ID from merchant account & paste here.
Authorize.net transaction key = Copy API Transaction Key from merchant account & paste here
The rest of the settings are well described with images on the settings page.
Note: You need to configure the Default Relay Response URL in you authorized.net account. The Relay Response URL will be "http://your_moodle_website/enrol/authorizedotnet/ipn.php"
To add a Default Relay Response URL:
Log into the Merchant Interface at https://account.authorize.net/ or Sandbox Interface https://sandbox.authorize.net/.
Click Account from the main toolbar.
Click Response/Receipt URLs under Transaction Format Settings.
Click Edit next to Default Relay Response URL. The Relay Response page appears.
In the URL text field, enter the URL where the payment gateway should send the transaction response. This URL must start with either "http://" or "https://". Parameterized URLs are not permitted.
Click Submit. A confirmation message indicates that the URL has been added.
To add a URL to the list of authorized Response or Receipt URLs:
Log into the Merchant Interface at https://account.authorize.net/ or Sandbox Interface https://sandbox.authorize.net/.
Click Account from the main toolbar.
Click Response/Receipt URLs under Transaction Format Settings.
Click Add URL.
Enter the new URL. This URL must start with either "http://" or "https://".
Click Submit.
Stripe Settings:
payment Gateway
If you want to use Stripe Payment Gateway
please select Allow stripe payment to "yes"
In test mode enable the sandbox. In live mode, dibable it.
Stripe Publishable Key = The API Publishable Key of your Stripe account
Stripe Secret Key = The API Secret Key of your Stripe account
Creating Stripe Merchant Account :
1) Create account at https://stripe.com.
2) Complete your merchant profile details from https://dashboard.stripe.com/account.
3) Now set up secret key and publishers key at https://dashboard.stripe.com/account/apikeys.
4) For test mode use test api keys and for live mode use live api keys.
Now you are done with merchant account set up.

Now click save changes and your Payment gateways are ready.
Emails Settings
Select who you want to notify and compile your email body from here for new enrolment.

And click save changes and you are all set.
Shop Page Settings
At first, let’s check how our shop page looks like:

Settings:
Whatever name you type in there, will appear here:

Next section is the :

Change this text using this setting :

The next section is the Product category i.e, Course Category. They are automatically created from your Moodle course category.
When you select a category, it will list all the courses in the bottom as products.

The next element is the banner:


You can change the text and put any link there:


Course-Complex block
This is the Course-Complex block.

Blocks can be added to a page by turning editing on then using the 'Add a block' drop-down menu.
Please add "Link to Course-Complex block " to any page you want.
Frontend pages samples


Additional Information
The entire code is checked
using https://moodle.org/plugins/local_codechecker and https://moodle.org/plugins/local_moodlecheck
- Only standard coding technique is used.
- Compliant with Moodle Coding Style.
Intentianal Exception:
1. Stripe SDK, Authorize.Net SDK, since it is not appropriate to alter the supplied code from such standard SDKs.
2. Code Checker Warning: Expected login check (require_login, require_course_login, require_admin, admin_externalpage_setup) following config inclusion. None found.
On shop page and single product page
Reason: they are public page and does not require login.


A blank index.php file is included in the CourseComplex.zip so that users can not download any file from the local folder when directory indexing is turned on on a server.
This is is standard procedure for any local plugin type for moodle.
Update
Installing an update
The steps depend on your Moodle version:
If you are using Moodle 3.0 or any later version, you can update the plugin just like a new installation.
Thank you.